Tuesday, August 30, 2011

Piñones en Sirmione / Pine-nuts in Sirmione

(English version below)


Este verano no tuve grandes vacaciones, pero varias chiquitas y muchas visitas! La visita mas amorosa de todas fue la de mi mamucha y una de mis hermanas, Mecha. Era el fin de semana del 1 de agosto, es la fiesta nacional Suiza y por lo tanto feriado, asique aprovechamos para hacernos una escapada por ahi, otra vez a la bella Italia. Fuimos al lago de Garda, paramos en Sirmione (gracias a la gente de Italaus por los consejos!!!) y con un auto alquilado paseamos por los hermosos pueblitos de alrededor del lago.


Como explicarles lo bien que la pasamos y lo hermoso que es el lago de Garda ? Cada pueblito es un sueño, un castillo por aqui… ruinas de una mansion romana por alla… y las playitas … taaaaan adorables y ademas los cisnes te permiten  bañarte a su lado… un encanto de vacaciones, un encanto de lugar, un encanto de compañia.


Nos paseamos por todos lados y mientras caminabamos con A. vimos que en el piso habia nada mas y nada menos que piñones ! Sinceramente nunca habia visto los piñones  ¨salvajes ¨, estaba lleno de pinos, muchas veces veo muchos pinos en las ciudades pero no piñones en el piso… y mi culturita de chica de ciudad va agrandandose cuanto mas en contacto con la naturaleza estoy, me fascina ! Estos pinos se llaman "piñoneros" (Pinus pinea, http://es.wikipedia.org/wiki/Pinus_pinea)


El parque frente al hotel  (un hotel simple, acogedor y muy lindo -Hotel Ca’ Serena- se merecen la publicidad!), tiene muchos pinos asique a primera hora de la mañana A. se propuso como recolector de piñones, algo se me iba a ocurrir para difrutarlos en casa. 


Como buena turista cai en la tentacion de comprar pastas de todas formas y colores que venden en esos negocios tan kitsch para gente como nosotros y compre pasta (por que renegar del hecho de ser turistas maravillados si al fin y al cabo es lo que somos ?).  Como sigue el veranito, y agosto esta mucho mejor que julio, pense en hacer una ensalada de pasta fria y combinarla con piñones fresquitos y sobre todo baratos  (ojo con el Sindrome de la Boca de Pino no abusen de los piñones ! miren el post de Dianne Jacob en I will write for food). 


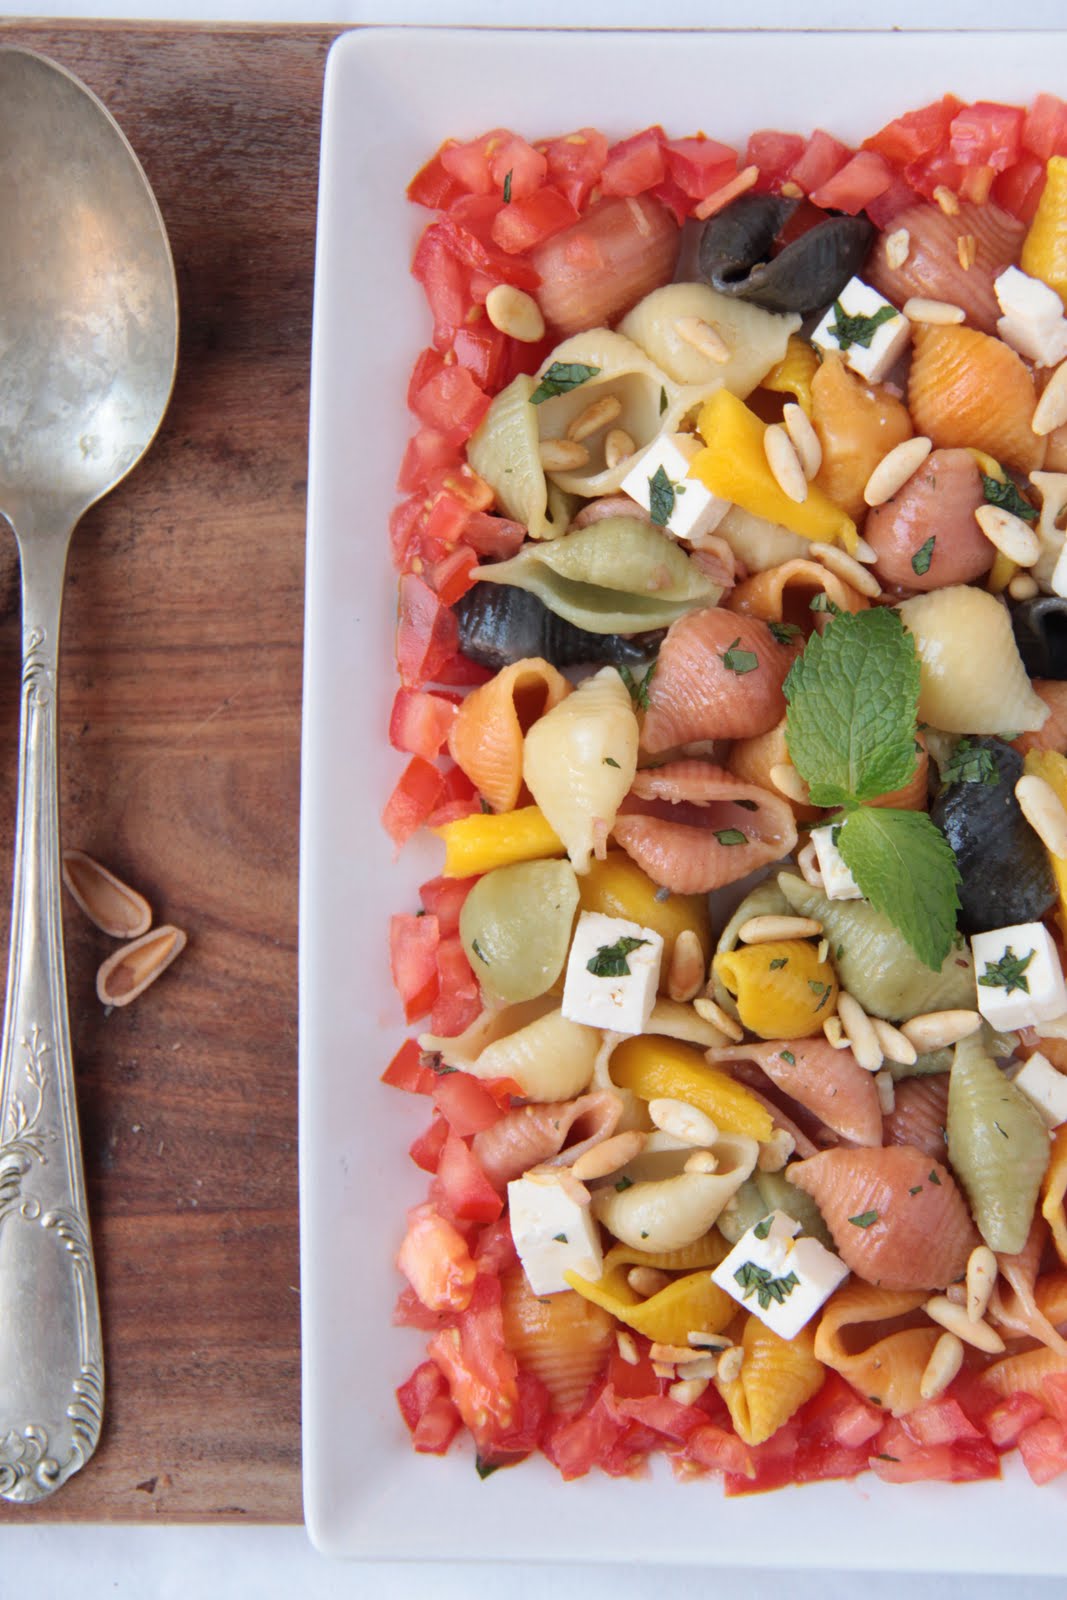
Un domingo de vuelta en casa vino a comer una amiga, habia planeado hacer esta ensalada de pasta pero con ingredientes muy diferentes a estos. Fui a hacer las compras y no habia nada de lo que necesitaba. Estaba ahi, en ese mini supermercado turco, el unico abierto el domingo, super decepcionada , pero... vi mango… queso feta… listo ahi se me ocurrio ! Ensalada de pasta con piñones tostados, mango y queso feta con vinagreta a la menta ! muy rica y veranil. Despues de estar una

Gracias a Delfi por tu ayuda en la cocina y en el styling  de las fotos ! 


English version
I didn’t have big vacations this summer but many short ones and a lot of visits! The loveliest one was that of my mommy and one of my sisters, Mecha. It was the weekend of August 1st, the Suisse National day which means, holiday. We decided to go once again to the beautiful Italy. We went to Garda Lake, we stayed in Sirmione (in fact not exactly but very close by and better since it was calmer, Colombare di Sirmione – thanks a lot to Italaus people for the precious advice!) and with a rented car we stopped by some of the enchanted villages around the lake. 


How to explain you how pleasant this trip was? the beauty of the lake… each village is a dream came true, a castle here, some roman ruins there… and the beaches, small beaches soooo adorable and lucky us… the swans allowed us to bathe with them!... lovely vacations, lovely place, lovely company.


While we walked around here and there, something coughed our attention on the street; it was plenty of pine-nuts!! Honestly I had never seen “wild” pine-nuts before. I have seen many pine trees but never before the fruit!! And here it is once again, my little culture of a city girl becomes bigger every time I get near nature, I am fascinated by this! This tree is called "Stone Pine" (Pinus Pinea, http://en.wikipedia.org/wiki/Stone_Pine)


The park just in front of our hotel (a simple nice and welcoming one – Hotel Ca’Serena- come on they deserve the ad), is full of pines and thus pine-nuts all around! At first time in the morning A. proposed to pick up some while I took some photos. 


As the good tourist I am I felt tempted to buy some of this pasta of all shapes and colors sold in this kitsch shops for people like us (why denying the fact that I am a fascinated tourist if it is what I actually am?). Since it is summer  and luckily August is much better than July, I thought of doing a pasta salad with colorful pasta and toasted, fresh and un-expensive pine-nuts (beware of the Pine Mouth Syndrome, do not abuse with pine-nuts or a bitter taste in your mouth can appear, read more in I will write for food). 


One Sunday back home, I was with a dear friend of mine and so a perfect occasion to do this pasta salad. I had thought of doing it with completely different ingredients that these ones but when I went to the Turkish mini-market (that I absolutely love and is the only one opened on Sunday) I found nothing of that I wanted. Disappointment… but then I saw mango and feta cheese… and the little light in my head was turned on again! Pasta salad, pine-nuts, mango, feta and mint dressing! Fresh and summery.

Thanks to my friend Delfi for her help in cooking and styling!!!


Receta /Recipe


Hervir mucha agua con sal en una cacerola grande, verter la pasta y cocinar. El tiempo de coccion depende de la marca pero en general es de 8 a 10 minutos. Probala despues de 6 minutos para ver como va la coccion. Debe quedar al dente, un poco durita pero gomosa. Una vez hecha, colar la pasta y dejar enfriar en un bowl grande con un chorrito de aceite de oliva para que no se pegue. Reservar.

Para hacer la vinagreta: Picar la cebolla bien chiquita y ponerla en un recipiente con tapa (a rosca mejor). Agregar el aceite, el limon y la menta finamente picada. Batir vigorosamente y reservar.

Tostar los piñones en una sarten. Deben estar todos en el mismo plano, no superpuestos. Cortar el mango, tomate y queso feta en cuadraditos.

Verter la vinagreta en la pasta y mezclar suavemente, no queremos que se rompa la pasta. Agregar los demas ingredientes y continuar mezclando. Cuando todo esta incorporado y la ensalada esta brillante y con un aroma que despierta el apetito esta lista para servir!! Si preferis, el tomate ponelo alrededor de la ensalada como en las fotos!


Cook the pasta in a big saucepan with a lot of salted boiling water. The cooking time depends on the brand of the pasta, around 8-10 minutes maximum in general, taste it after 6 minutes, they should be al dente, quite hard but chewy. Once done strain the pasta and put it in a bowl to cool down with a bit of olive oil to avoid sticking. Reserve

Make the dressing: Mince the onion in very tiny pieces and put it in a flask with cover. Add the olive oil, lemon juice and mint finely chopped. Shake vigorously (it seems that I am writing a protocol for an experiment in the lab...). Reserve

Toast the pine-nuts. Cut the mango, feta cheese and tomatoes in squares.

Pour the dressing in the pasta salad and incorporate it by mixing not to harshly, you don't want to break the pasta. Add the rest of the ingredients, mix a bit and serve! If you want to present it like in the photos, do not incorporate the tomatoes, just put them around the salad.

Saturday, August 20, 2011

Un descanso en Cerdeña/ Relax in Sardinia

(English version below)

Como se imaginan una pausa de 3 dias en una isla Italiana? Una hora de avión desde Milan y se llega a este paraíso, Cerdeña, Alguero. La belleza del lugar, el agua turquesa y transparente, calida. Mucho verde y mucho calor. No nos olvidemos de la gran simpatia que regalan los italianos! Todo esto no hace de un lugar el paraíso? Y si ademas hay una familia con los brazos abiertos que te recibe con toda la alegria y cariño que tienen para dar? Increíble no? un verdadero placer, 3 días especiales para recargar las pilas.


A quien no le gusta pasar unos días de playa y sol? Panza arriba bajo la sombrilla o el sol (ojo a cuidarse del sol eh!!!), libro en una mano, coco fresco en la otra y de a ratos una siestita bajo la sombrilla! de solo pensarlo me traslado a esos momentos y por un segundo puedo sentir el sonido del mar y el calor de la arena... esos placeres de la vida. Cierren los ojos e imaginen... aaaa que lindo no?


La familia de A. tiene una casa en Capocaccia, reserva natural, parque casi salvaje y al final del camino una playa hermosa, ademas creo que no hace falta que les diga que en Italia se come bien... eso lo sabemos todos pero si encima cocinan especialmente para uno es mas que agasajador, ñoquis sardos, caracoles, lechón asado, profiteroles y amaretti, entre otras cosas. 


Una tia de A. es especialista en pastelería sarda y como saben que a mi tambien me gusta la pastelería una noche hizo amaretis. Nunca fui muy fanatica pero es muy difícil que yo diga que no a algo caserito... y si ademas esta hecho especialmente para nosotros tiene un sabor aun mas dulce. Digamos que el primero lo probé con desconfianza y un poco de compromiso, ademas después de una cena a la Italiana no queda mucho espacio para el postre...  Pero si les digo que son lo amaretis mas ricos que comí en mi vida, me creen?


Después del primero, si comi muchos mas después del primero..., y también al otro día..., agarre lápiz y papel y a anotar la receta. Acá los comparto con ustedes así pueden disfrutar de estos amaretis riquisimos y caseritos con un rico cafe a la italiana, un buen "ristretto"!


English version
How do you think of a 3-days break in an Italian island ? One hour flight from Milan and there you are, in paradise… Sardinia, Alghero. The beauty of the place, the warm and turquoise-transparent sea, the green some kind of wild-natured places and hot weather, without forgeting the great kindness of italians! All these things together, don’t they make of Alghero the paradise? And if we add a family waiting for us with their arms wide open that receives you with all the happiness and love they have… how incredible! A real pleasure, 3 special days to charge batteries.


Who doesn’t like to spend some days on the beach? Just relax under the sun (but not too much, the sun can be dangerous!!! … ). A book in one hand, a fresh coconut on the other and a little nap form time to time under the sunshade… just the thought of it makes me come back there and for a second I can hear the noise of the sea and feel the warmth of the sand, those pleasures of life. Close your eyes and imagine…ooohhh nice no?

A.’s family has a house in Capocaccia, nature reserve and almost wild vegetation and at the end of the park a breathtaking beach. Besides, I think I don’t have to tell you how good Italian food is, everybody knows that, but if you get to eat home made Italian food specially made for you it is even better. Sardinian ¨gnocchetti¨ (I will post about it when I have the good ingredients), snails, roasted piglet, ¨profiterol¨ and ¨amaretti¨, and many other things, all of them absolutely delicious.


One of A.’s aunts is a specialist on Sardinian patisserie and since they knew that I love patisserie as well she prepared amaretti for us. I am not a big fan of amaretti but it’s rare if I say no to something homemade and if it was prepared in one’s honor it has an added value, don’t you think? After eating the first one, ooohhh yes I eat many after the first one..., I understood that I wasn’t a big fan of amaretti because I had never tried these. The best ones ever, I absolutely loved them!!

So the day after, just before leaving, I was still eating amaretti, I decided to take pen and paper and ask for the recipe of these sweet-bitter-spongy-almond like cookies. Is it a cookie? Not sure? Just amaretti. Here I share this recipe with you so you can also enjoy and just a piece of advice, have a good Italian coffee with them, a ¨ristretto¨!


Receta/Recipe


Precalentar el horno a 160°C.
Se mezcla todo en el orden que aparece en la lista de ingredientes. La receta que me dio la tia de Ale no es con esencia de almendras sino con 50 gr de polvo de almendras amargas (y en lugar de 500 de almendras dulces, se agrega 450 gr), pero parece que fuera de Cerdeña no es facil de conseguir. Yo use esencia y quedaron buenisimos igual!
Se hacen bolitas con la mano, yo las hice de 3 cm de dimetro pero eso es a gusto. Estas bolitas resultan en amaretti de 6 cm de diametro. Poner las bolitas espaciadas, que no se toquen en la placa porque aumentan su volumen y se pueden pegar unas a otras. Espolvorear con azúcar (opcional). Hornear en la mitad del horno a 160°C por 15 a 20 minutos o hasta que estén doraditos.


Preheat the oven at 160°C.
Mix everything in a bowl in the order appearing in the ingredient list. The recipe that A.'s auntie gave me is with 50 gr of bitter almond powder (and 450 gr of sweet almond powder instead of 500 gr) but it seems (I could prove it) that apart from Sardinia is not sold anywhere else, at least the places I looked for... including Rome.
Make 3 cm balls with your hands (the size is really up to you, this is the way I did it) and put them on a baking tray separated form each other (they grow in volume and you don't want them to stick between them) and if you want sprinkle them with sugar. The resulting amaretti will be of 6 cm. Bake in the middle of the oven at 160°C for 15 to 20 minutes or until golden brown. 


Sunday, July 17, 2011

Una dulce visita citrica / A sweet citric visit

English version bellow

Hola!!! Apareci otra vez despues de un tiempito... Entre visitas, trabajo y unas mini-vacaciones no pude sentarme a contarles cosas, pero aca estoy otra vez para compratir con ustedes una torta fresquita y rica! Les presento al Lemon Frost, una torta citrica dedicada a un amigo.

Plateau fait par Floriane. Merci!!!


Cuando sos un estudiante extranjero conoces mucha gente de mil lugares diferentes y ese intercambio
cultural es genial pero todos estamos de paso, asi como venimos nos vamos y esa es la parte triste de la historia. La parte alegre de la historia es cuando vienen de visita!


El año pasado soliamos juntarnos con un grupo de etnias bastante variadas (España, Mejico, Argentina, Francia y a veces mas que eso!) pero con algunas cosas en comun, el amor por la cocina y las ganas de pasar buenos momentos. Lo llamamos el Recipe book. Nos juntabamos una vez por semana a cocinar en la casa de alguno de nostros, aleatoriamente. El resultado: comidas muy ricas en calorias, divertidas y curiosas.


El creador de esta gran idea fue Gerard, el famoso amigo que se fue, nada mas y nada menos que a Japon, y que vino de visita! En su honor revivimos el Recipe book!
Es verano, hace calor, si si en Suiza HAY dias de calor, y es gratificante pasar una tarde en un hermoso jardin (gracias Rayanne!) con amigos comiendo unos salames españoles y tomando unas cervezas frias y Sake (un regalo de nuestro amigo ahora japones) mientras esperamos que se haga el asadito.
Mi parte... el postre obvio... y para esta ocacion tenia que ser algo fresco y nuevo sobre todo nuevo. Pense en mi hermana, siempre pienso en ella cuando necesito una rica receta. Me acorde cuanto me gustaba el lemon frost, el protagonista del momento. Cremoso, acido y dulce a la vez, fresco y lindo. Que buena idea no?


Necesito la receta del lemon frost para hoy!, le dije a mi hermana por chat.
Mmm algo de maizena.... un poco de jugo de limon eeeeehhh Ah si! una taza o algo asi de azucar tambien....
Estas son sus medida "a ojo" (es una gran cocinera mi hermana, te quiero Menchu!) pero como la base, que es el lemon pie, ya la vivimos, hoy no hubo mayores complicaciones asique solo fue un poco de chat y al supermercado.
Crema de limon, merengue, crema chantilly y un congelador es lo que se necesita para hacer esta delicia. Ah me olvidaba, tambien se necesita un poco de espacio en la pancita porque es muy dificil decir que no a la segunda porcion!!


Debo decir que tuvo muy buena aceptación! a todos les encanto pero hubo una pequeña critica muy acertada con respecto a la masa asique esta es una receta modificada y que, doy fe, queda mucho mejor!!! Disfrutenla!!

English!!
Hey it's been a long time! I have been busy... between visits, work and short vacations it was quite difficult to keep up. I will talk later about my short vacations, instead I will share a recipe that I think you will appreciate, specially for this high temperatures! I want to present you the iced lemon pie that I made for a someone I really like!


When you are a student leaving abroad you get to know a lot of people from different parts of the world and this is absolutely amazing. Many people come and go and when they leave is kind of sad... the happy side is when they come back to visit!!!
Last year we used to do this dinners with some friends a little bit from everywhere, Mexico, Spain, Argentina, France, etc. We got together once a week to cook and have dinner of the freshly prepared dishes each of us cooked. We called it The Recipe Book. The cooking style of each of us and mixture of countries made it very rich in calories funny and curious. The best part of it all was anyway to get together and share the moment. The creator of this huge thing was Gerard, the guy that left to Japan but came back to visit!
And guess what?! we did a special Recipe Book dinner in his honor!


It is summer and hot, yes even in Switzerland we have very hot and long days, it is amazing to be in a lovely garden (thanks Rayanne!) with friends having some Spanish salami and drinking beers and ¨fruity¨ Sake while waiting for the BBQ to be ready.
The dessert was of course my job and for this occasion I had to choose something new and refreshing. I thought of my sister, I always think of her when I need a recipe and I soon reminded how good was the iced lemon pie she used to do. Creamy, acid/sweet, fresh and beautiful. It seemed a very good idea.


I need the recipe for the iced lemon pie for today!!! I told my sister, of course everything at the very last second.
Some maizena, mmm a little bit of lemon juice and... eeehhmmm ah yes sugar as well, a cup or something like that...
These are the ¨by eye¨ measurements of her (she is a great cooker, love you Menchu!!). Anyways she already taught me how to do the lemon pie base so today only a bit of chatting was enough and off to the supermarket.
Lemon curd, meringue, chantilly cream and a freezer is what you need for this summery dessert. Oh yes you also need some space in your stomach because it is very difficult to say no thanks to the second piece.


Everyone appreciated a lot this dessert and I loved it as well!! I had one very wise critic about the pastry base so this is a modified recipe I made at home on a Sunday afternoon that I think is much better for this frozen version of the lemon pie. Enjoy!!

Receta / Recipe


La previa
Enmantecar y enharinar un molde de torta desmontable de 24 cm. Precalentar el horno a 250°C. Sacar los huevos de la heladera. Hacer lugar en el freezer.
Base
Batir los huevos a temperatura ambiente y agregar el azucar gradualmente hasta que quede cremoso y
triplique su volumen. Agregar el harina de a poco e incorporar con movimientos envolventes. Verter en el molde y hornear a 180 °C en el estante medio del horno por 10 minutos. Esta masa es fina y se pasa facilmente, no sobre-cocinar sino se seca al enfriar. Una vez lista, desmoldar en tibio y conservar
envuelta en un paño humedo.
Pasta de limon 
Disolver el azucar en 1 taza de agua en la hornalla a fuego medio alto, no hervir! Disolver la maizena en 1/2 taza de agua bien fria hasta que quede un liquido blanco sin grumos. Incorporar la maizena en el agua azucarada sobre fuego medio-alto sin dejar de revolver con cuchara de madera. Revolver hasta que la mezcla espese. Para evitar la formacion de grumos, nunca dejar de revolver. La pasta tiene que formar picos que caigan lentamente. Retirar del fuego y dejar que entibie. Batir las yemas e incorporarlas a la mezcla de maizena hasta obtener una pasta homogénea y bien amarilla. Agregar de a poco el jugo de limon y revolver hasta obtener nuevamente una pasta homogénea. Esta pasta se puede conservar maximisino por dos dias en la heladera en una bolsa de plastico o en un recipiente tapado con papel film en contacto directo con la superficie de la pasta de limon. Tambien se puede congelar.
Crema
Crema chantilly: Batir con batidora electrica la crema bien fría con el azúcar hasta que este lo suficientemente firme como para que forme picos. Si aparecen grumos y el color se vuelve amarillento... se paso... empeza todo de nuevo. Si es la primera vez que lo haces compra dos potes de crema por las dudas... Si todo sale bien reservar en heladera.
Merengue: Disolver el azúcar en la claras a baño maria. Una vez disuelto el azúcar retirar del fuego y batir con batidora eléctrica hasta que el merengue forme picos no muy firmes. Si aparecen grumos quiere decir que se paso... pero se puede recuperar agregando una clara mas.
Incorporar de a poco la crema en el merengue con movimientos envolventes. Agregar el jugo de limon mezclando siempre con movimientos envolventes. Tiene que quedar una crema blanca y suave.
Ensamblado
Poner la base nuevamente en el molde de torta desmontable. Verter la pasta de limon a temperatura ambiente o fria y por ultimo la crema. Congelar.
Desmoldado
Frotar con algo tibio las paredes del molde (manos, trapo humedo calentito, etc), pasar la parte lisa de un cuchillo de hoja muy fina entre la torta y el molde y muy cuidadosamente retirar el anillo de la base del molde. Servir directamente o pasar con una espátula grande a un plato lindo.
Consejo
Congelar solo 1 o 2 horas y servir. Si se congela el dia antes de consumir, sacar la tortala del freezer 10 minutitos antes de servir.


English version
Before you start
Butter and flour a a cake pan (preferably a false-bottomed pan). Pre-heat the oven at 250°C. Take the eggs out the fridge and make a place in the freezer.
Base
Gradually beat the sugar into the eggs. Continue beating until mixture is thick, creamy and has triplicated  its volume. Add the flour spoon by spoon and mix with enveloping movements. Pour the mixture into the cake pan and cook for 10 minutes at 180°C in the middle level of the oven. Do not overcook or it will dry out once cooled. Remove from the cake pan when warm and reserve. Cover with a damp cloth.
Lemon curd
Dissolve the  sugar in 1 cup of water over middle-high heat (do not let it to reach to a boil). In parallel dissolve the cornstarch in cold water making sure there are no lumps (it should result in a white liquid). Once the sugar is completely dissolve pour slowly the cornstarch mixing continuously with a wooden spoon. Mix until thick. Never stop mixing or you will have lumps. The mixture will be ready when it can form very soft peaks. Remove from heat.
Beat the yolks and pour them slowly into the cornstarch mixture. Once completely incorporated and vivid yellow add the lemon juice and mix again until homogenous. Let cool. You can freeze this cream or keep it in the fridge for 2 days in a plastic bag or in a recipient covered with paper film directly touching the surface of the lemon curd.
Cream
Chantilly cream: Gradually beat the sugar into the very cold cream. Beat until the formation soft peaks. If lumps appear and the color turns yellow, start again... If you have never done it before buy 2 pots of cream to be sure. Reserve (in the fridge)
Meringue: Dissolve the sugar in the egg whites in a water bath. Once dissolve remove from heat and beat until the formation of soft peaks. If lumps appear you whipped too much but you can recuperate the meringue by adding Unmolding one egg white.
Gradually incorporate the cream into the meringue and mix continuously with enveloping movements. Once smooth add the lemon juice and mix again until smooth.
To assemble
Put the base in the cake pan again and pour the lemon curd at room temperature or cold. Finally Pour the cream and freeze.
Unmolding
Run over a warm cloth or your hands (careful! it will be too cold...) on the sides of the mold and run a knife between the cake and the edge of the pan. Very carefully release the rim from the false bottom and with a big spatula pass the cake to a serving dish or serve directly.
Piece of advice
Freeze for and hour or two or if you do it the day before take the cake out of the freezer 10 minutes before serving.